
Using Your Schedule Planner
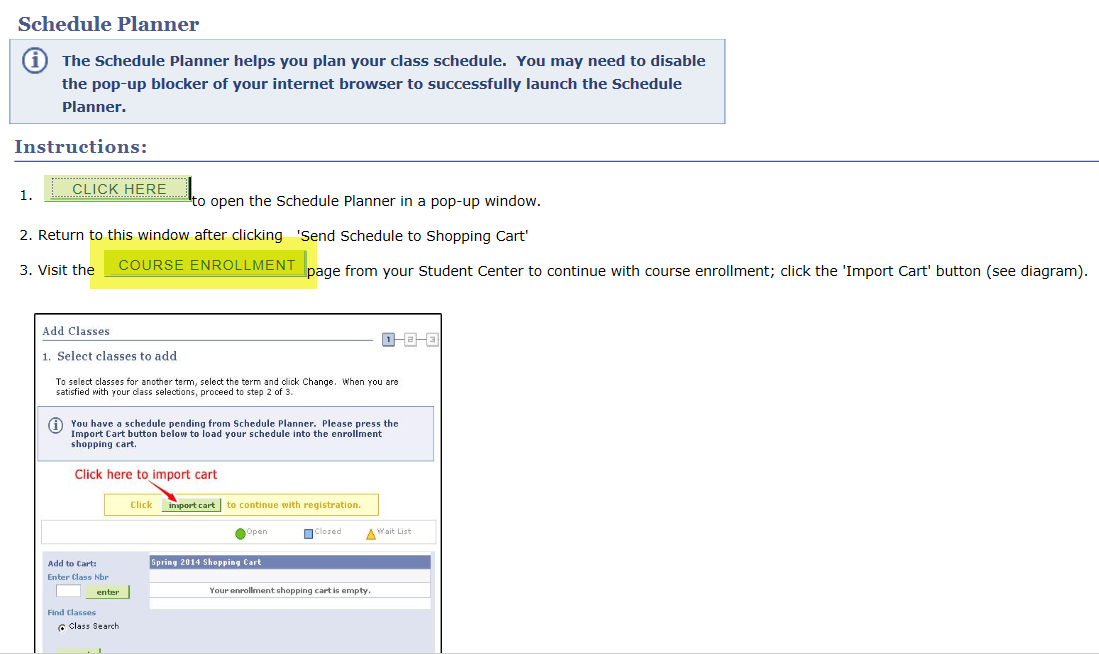
1. Select “Schedule Planner” and the “CLICK HERE” button from the following page to get started on selecting courses to find various schedule options.
Note: the instructions on this page explain that you’ll be directed to Schedule Planner to build schedules.
2. Import the schedule of your choice by navigating back to Plan > Shopping Cart or Enroll > Add to and clicking the “Import Cart” button. Your main Student Center page will remain open in another window.

3. Once in Schedule Planner, note the various search options that will help you narrow down class sections and build your ideal schedule!
Example: Update Course Status to “Open & Full w/Waitlist Open” to look for sections that either have seats available or have waitlist seats available. If you’re interested in narrowing your results to an on-campus class, select “Face to Face Instruction” for Instruction Mode. See additional information in our FAQs about Instruction Modes and other search options.

4. To add courses by searching the subject, select the subject from the ‘By Subject’ tab.

5. Select the course from the dropdown list.
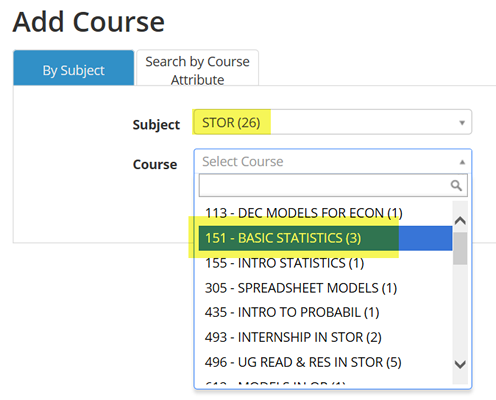
Note that after selecting the subject/course, you can view the course description before clicking the “Add Course” icon.
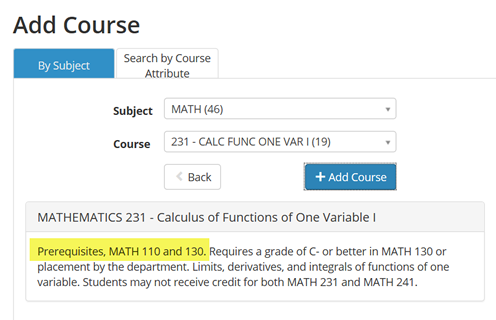
6. Review the course description at this point for information about the course and its requisites.
After reviewing the course information, click the “Add Course” icon to add the course to your desired list.

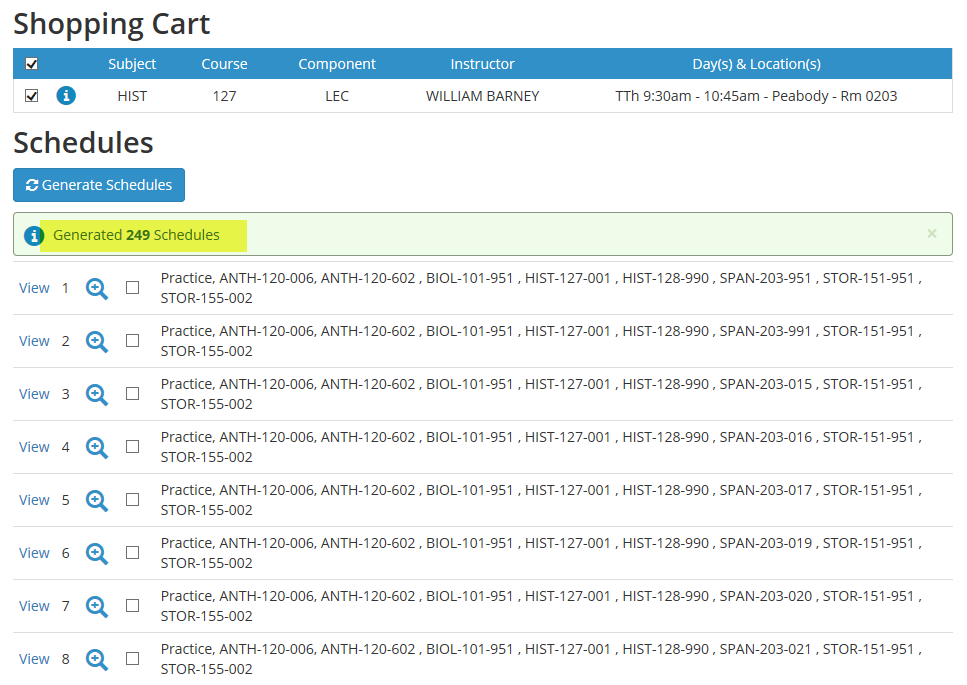
7. You will see a message indicating that the course has been added to the list:

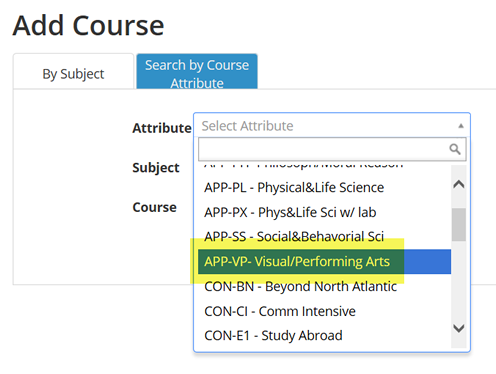
8. You may also search by Course Attributes to add courses that will fulfill General Education requirements. (View the University Catalog for more information or consult with your academic advisor.)
Click the “Search by Course Attribute” tab and select the attribute. In this example, we are interested in finding a class that will fulfill the Visual/Performing Arts General Education requirement:
9. Select a subject.
This listing is showing only subjects that have classes scheduled for the term that will fulfill this General Education requirement.
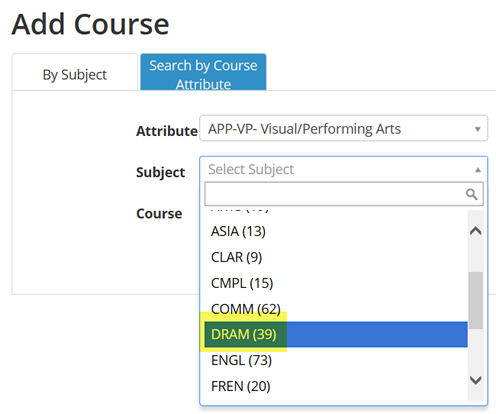
In this example, we’re interested in a DRAM course that fulfills the Visual/Performing Arts requirement.
10. Select a course.
Again, the listing at this point would include only DRAM courses that fulfill the Visual/Performing Arts General Education requirement, like DRAM 120.

After reviewing the course information, click the “Add Course” icon to add the course to your desired list.
Note: You can ensure the class is meeting a general education requirement when viewing it in your shopping cart prior to enrolling. To see that information, click on the class link from your shopping cart:
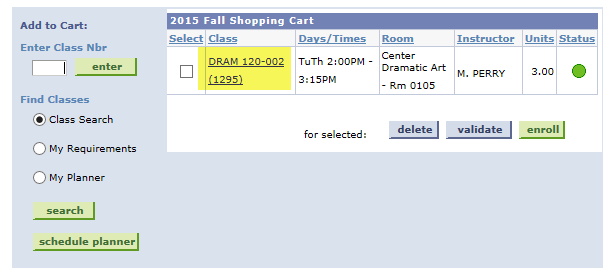
These general education requirements/attributes will be listed under Enrollment Information:
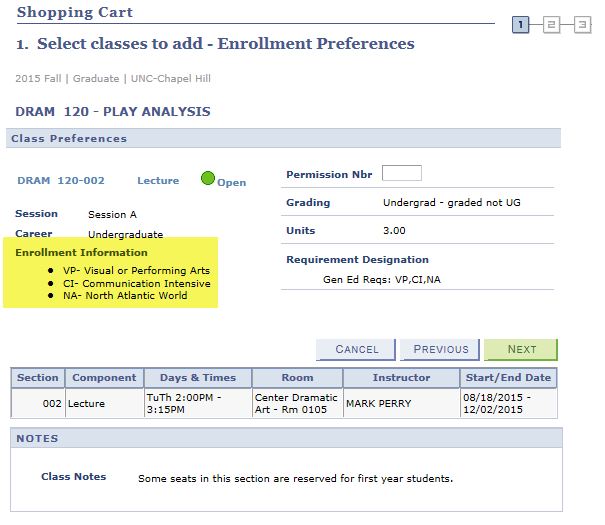
This example shows that DRAM 120 meets the following general education requirements:
- VP – Visual or Performing Arts
- CI – Communication Intensive
- NA – North Atlantic World
If you have additional questions about general education requirements or attributes on courses after reviewing the University Catalog, it’s best to check with your Academic Advisor.
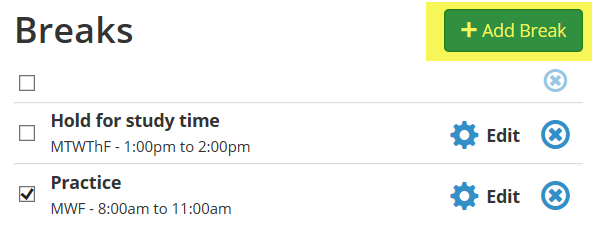
11. Are there times during the day when you cannot take classes due to work, practices, or other commitments?Add “Breaks” in Schedule Planner, and you can search for schedules that include only classes outside of these times. You can also save all of your potential break periods, and then select which ones you want to incorporate into your schedule options at that time by using the check-box for those specific breaks.
12. After you add the courses and breaks, and select classes already in your shopping cart, click the icon to generate and review all possible schedules that meet your criteria. Or, to add more courses to your schedules, click “+ Add Course” to select them.Once the courses are added, you can select which courses should be added to your schedule options by placing a check-mark next to them. You can put a whole list of potential courses there, and then pick your favorites first to see if the generated schedules are what you want.If they are not, you can go back and select other courses to generate schedules.
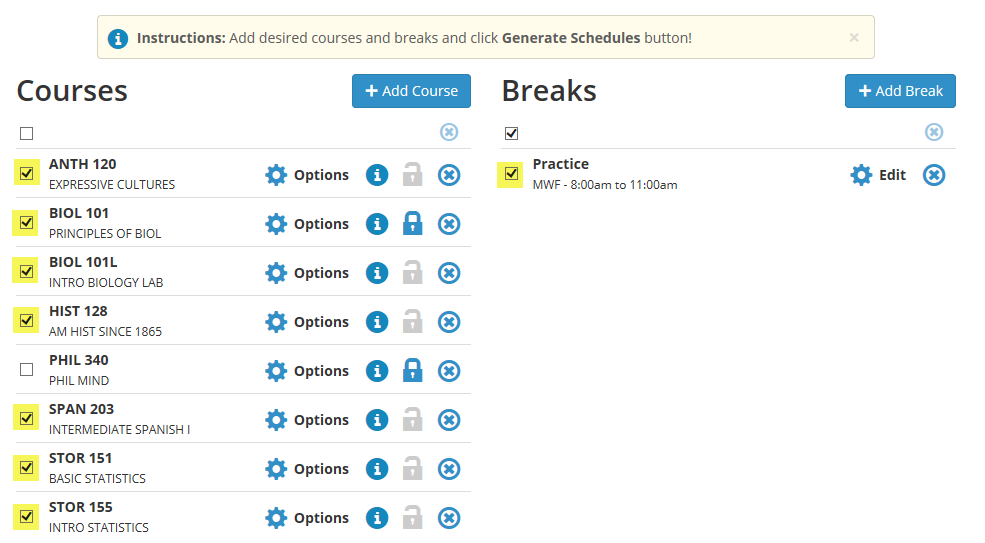
Note that if you already have classes in your shopping cart, you will see that section below Courses, and you can also chose to include those selections when generating schedules:

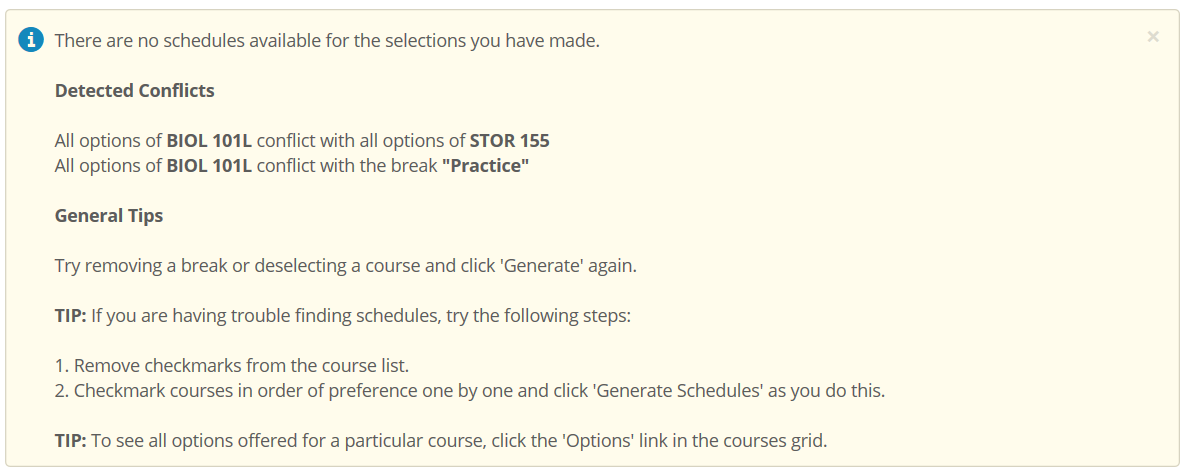
13. After you attempt to generate schedules, any detected time conflicts will appear in a message. You must resolve the conflicts before schedules can be generated.
For Example: If every option of BIOL 101L is conflicting with STOR 155 or your “Practice” break, you will need to uncheck BIOL 101L and then generate schedule options.
14. Once you review any conflicts, and generate schedules, all available schedules that meet your criteria will appear. An information box will let you know how many schedule options are available.
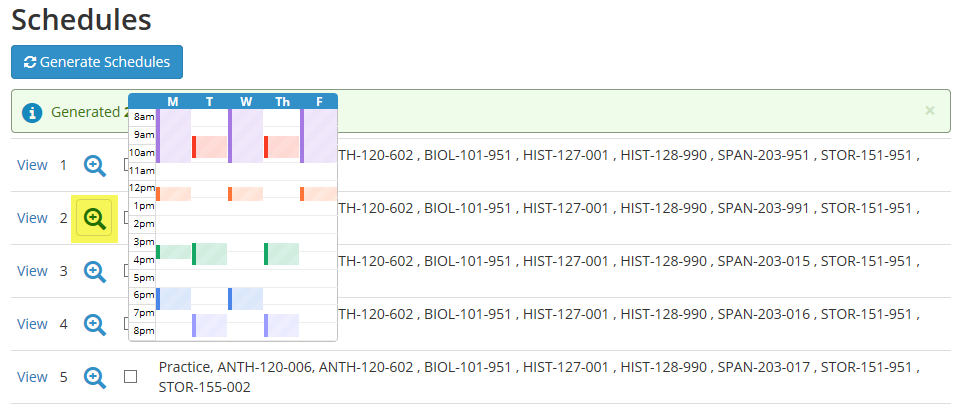
15. To view the weekly schedule format of a schedule option, click the magnifying glass.
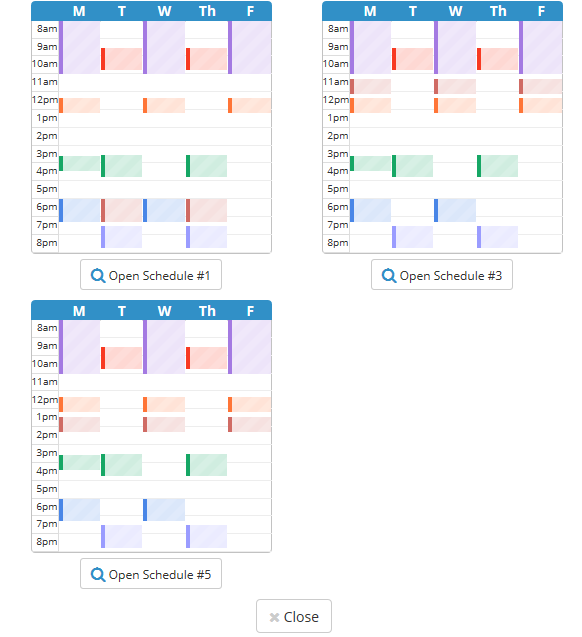
16. To compare schedule options, select the schedules of interest and click the “Compare” icon.

17. You can then open and begin reviewing class information. Be sure to check for any class restrictions that you may not meet. If you import a schedule with restrictions into your shopping cart, you’ll receive enrollment error messages when clicking “Finish Enrolling” from your enrollment Student Center page when your enrollment appointment starts. Remember that you’ll want to take notice of the pre- or co-requisites when you first add the course, prior to generating schedules.
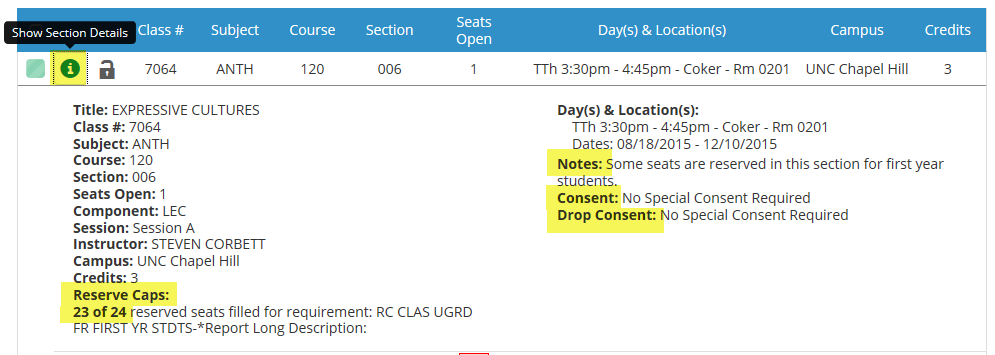
Then, when reviewing results after generating schedules, click the “Show Section Details” icon to view additional information and possible restrictions. It is important to review Reserve Caps (reserve capacities) that may be on the class to restrict that section to majors or certain classifications (sophomores, juniors, etc.).
If you have questions about the reserve capacities on a section, it is best to check with the teaching department of that course.Notice the “23 or 24” in the example below. This information shows you how many seats from the specific reserve capacity have been satisfied. If you see 24 of 24 filled on the Reserve Capacity, but still see open seats, you know that those remaining seats are available unless there are additional restrictions.
Also review the Notes section for additional information, as well as reviewing the “Consent” field to see if you need to contact the teaching department to be added to the class. A class may also have special Drop Consent, which is important to view if you need to drop the class at a later date after enrolling.
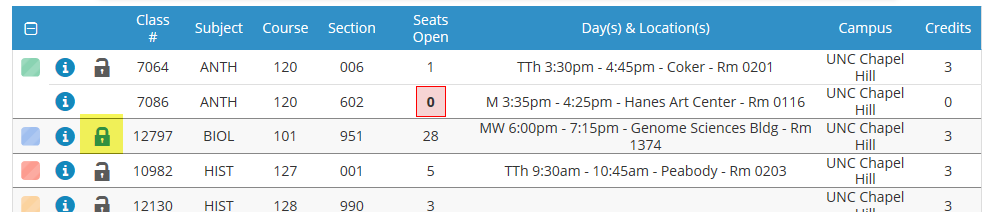
18. Make sure to check the number of open seats in classes.In this example, ANTH 120 006 (lecture) is open, but ANTH 120 602 (recitation) is full. Since lectures and recitations are tied together, you will receive an enrollment error message when trying to enroll in this combination after importing it into your shopping cart.
- If open sections are available, you can search for a different recitation.
- If you want to waitlist this lecture/recitation combination, you can include the “Waitlist if class is full” checkbox when importing into your shopping cart.

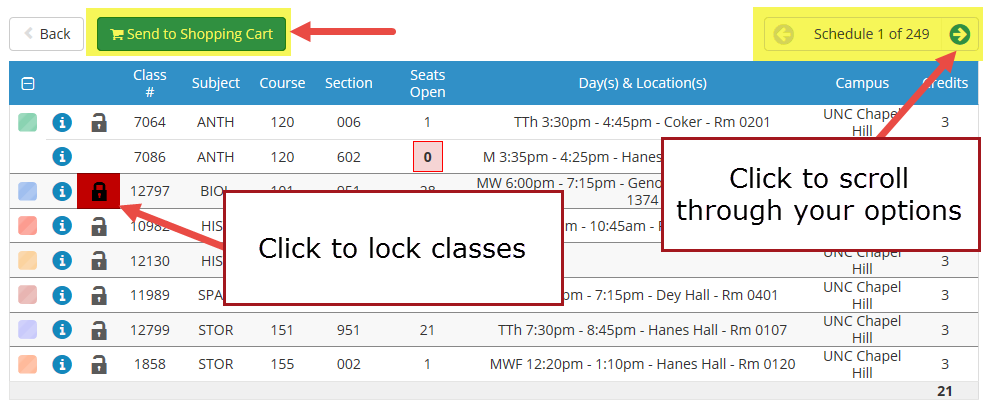
19. You can lock individual classes and then generate/review other schedule options for additional classes. To lock an individual class, click the lock icon. You can lock one or more classes at a time.
20. Continue to review schedules by scrolling through options, or lock classes, and then click “Send to Shopping Cart” when you’re done.
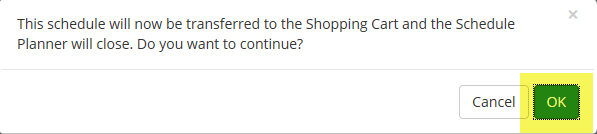
21. When you’re ready to send the schedule to your shopping cart, say OK after clicking “Send to Shopping Cart” and receiving this message:
22. You’ll receive a message telling you that your schedule is now ready to be imported. The message will include instructions.
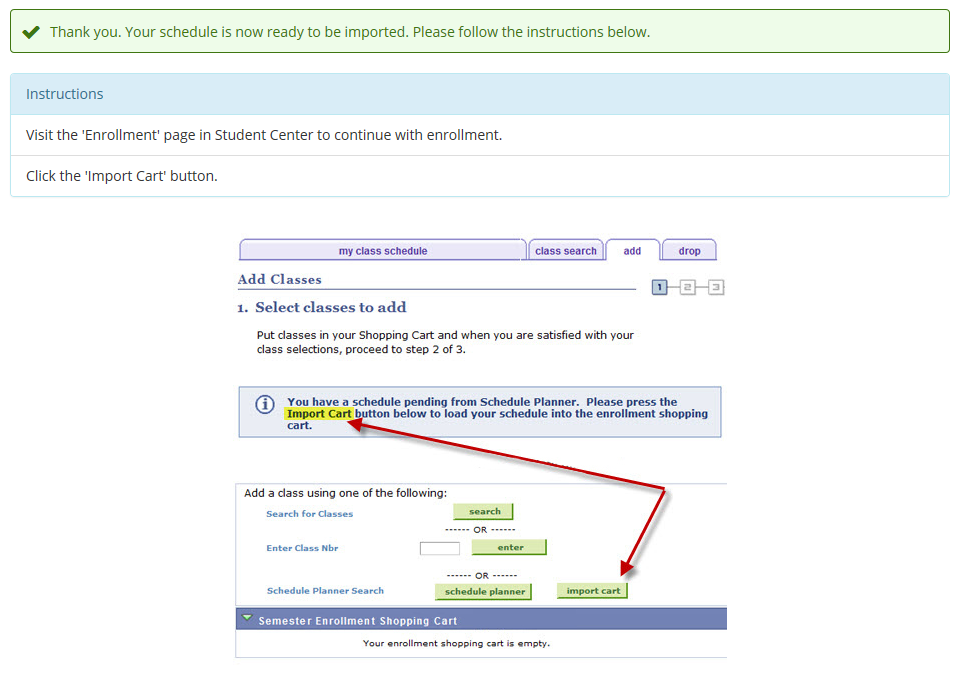
23. At this point you can flip back to your other tab and click the “COURSE ENROLLMENT” box:
24. Then you can import the classes from Enroll > Add or Plan > Shopping Cart by clicking the “Import Cart” icon.
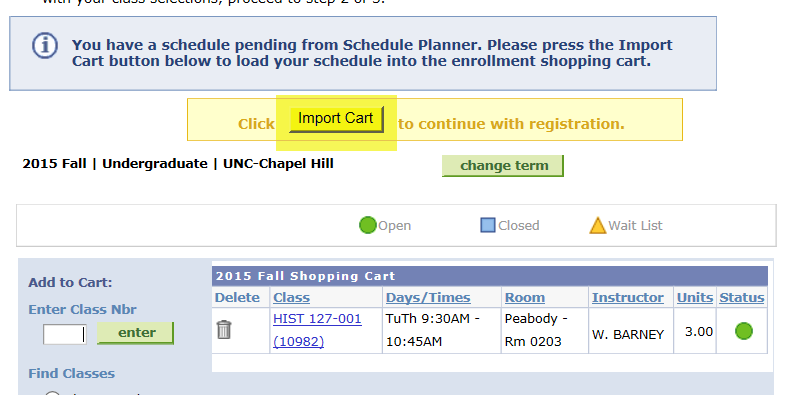
25. You’ll go through the Enrollment Preferences page class by class, and then you will receive a message saying that the import from Schedule Planner is complete.

26. Once your enrollment appointment starts, you can start enrolling in classes or continue to use Schedule Planner and other class search tools to fine tune your schedule.