
Creating and Saving a Grade File from Other Programs
The upload process requires a CSV (comma delimited) file with four columns:
- Column A: Student PID (required and in this column)
- Column B: Optional (may include student first/last name or left blank)
- Column C: Optional (may include student first/last name or left blank)
- Column D: Grade (required and in this column)
To create/save a grade file for uploading into a grade roster:
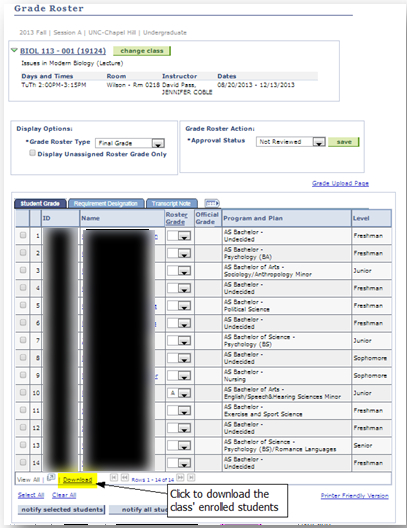
Step 1: Download data from Grade Roster
To create the Grade File from the Grade Roster, click the Download button at the bottom of the roster.
Open the downloaded file in Excel.
 Step 2: Convert the file for compatibility
The Excel grade file must now be converted for compatibility with the upload process.
- Highlight and delete the header row (Row 1)
- Highlight and delete the Program and Plan and Level columns (E and F).
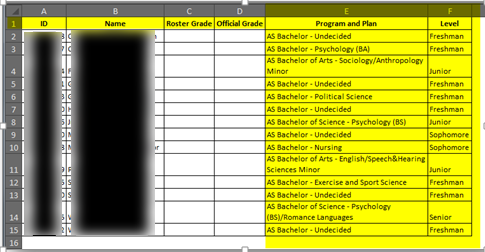
The file should now have data in Columns A and B (PID and student last name/first name).[/toggle]
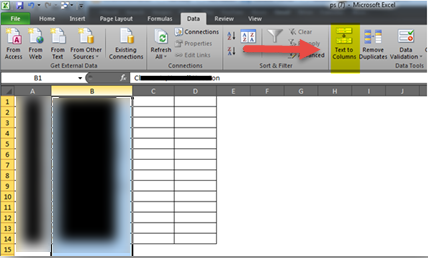
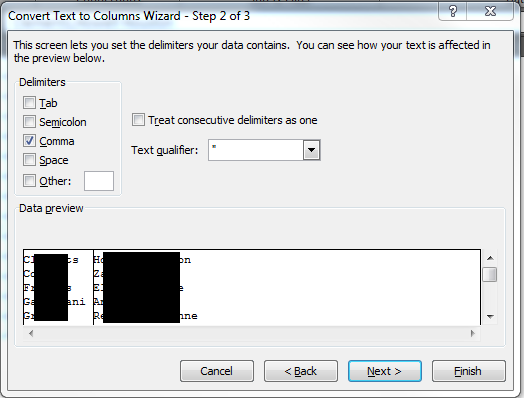
Step 3: Convert Text to Columns
- Highlight Column B
- From the Data menu of Excel, choose Text to Columns.
- Select the Delimited radio button in the convert text to columns wizard box and click Next.
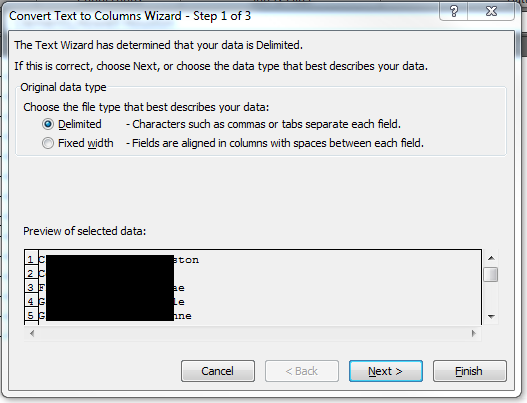
- Check Comma as the delimiter and click Finish
- Click OK to confirm overwriting the contents of Column C (currently blank).
Resulting file should now be formatted as:
- Column A: Student PID
- Column B: Student last name
- Column C: Student first name
- Column D: Available for grade assignment
Step 4: Enter Grades into Column D
- Manually input grades into Column D.
- While any value can be entered onto the spreadsheet, only a valid grade will successfully upload. For example, if a graduate “H” grade is assigned for an undergraduate student, no grade will upload for that student.
Step 5: Save Grade File
Once satisfied with the grades, chose Save As and save the file as a CSV (comma delimited) file.
For Mac/Excel users, select CSV (Comma Delimited) from the Save as Type dropdown box. Name the File as appropriate.

The Grade File is now ready to upload into the Grade Roster.