
Uploading Grades Into ConnectCarolina
Registrar Grading Policy
The initial process of entering grades in Faculty Center is the same for all grading roles. Faculty, Teaching Assistants and staff with proxy access have the ability to enter grades using Faculty Center.
-
- Please reference the University grading policies as needed.
Creating and Saving the Grade File from Sakai
-
- Log into your Sakai Gradebook.
- Click on the Course Grades tab.
- Click the Export for ConnectCarolina button.
Note: By default this will save the Sakai Course grades in your Downloads folder.
- Click the downloaded course grade file.
Note for MAC Users: Re-save the file as: Save As > Format > Specialty Formats > Windows CSV
- Review the Downloaded Grade File .CSV file.
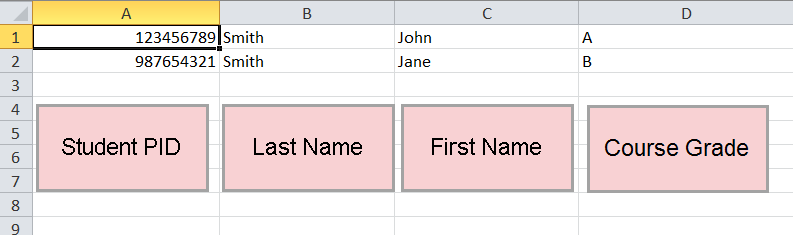
To properly work with the mass grade upload utility the column structure must be as follows.
-
- The first column will be for the student’s PID (required).
- The second column will be for the student’s last name (optional).
- The third column will be for the student’s first name (optional).
- The fourth column will be for the student’s grade (required).
Creating and Saving a Grade File from Other Programs
View a step-by-step tutorial to save a grade file from other programs.
Navigating to the Grade Upload Page in ConnectCarolina
- Log in to ConnectCarolina
- Click the Student Admin Workcenter tile.
- Click the Teaching Resources drop-down arrow to display a list of options
- Click the My Schedule link.
- Click on a class with a Grade Roster icon.
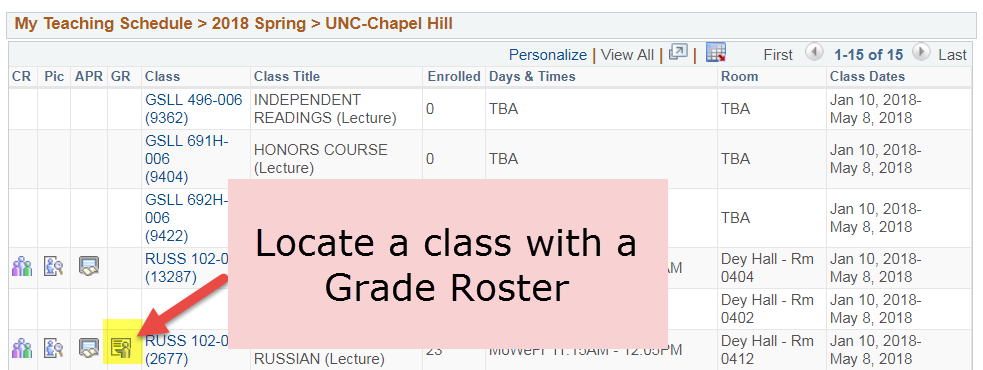
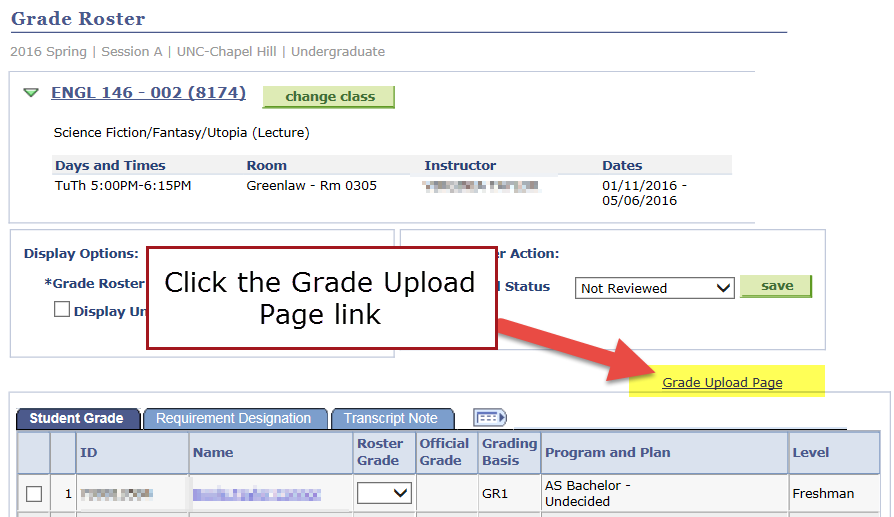
- On the Grade Roster page click on the Grade Upload Page link.
Uploading Mass Grades in ConnectCarolina
The Uploading Mass Grades process can be used to upload course grades at one time.
- Click the Upload Grade File button
- Click the Choose File button.
Click the Choose File button and locate the appropriate .csv file from your Downloads folder or where you have saved it.
ConnectCarolina will process the file selected. It will attempt to match the PIDs in the file to one of the PIDs in the class and assign the associated grade to that student, repeating the process for all of the entries in the file.
- Grade Upload Messages
Once the grade upload process is complete a confirmation message will be displayed.
If all of the PIDs in the file:
- Match all of the students in the class.
- Have a valid grade in the uploaded file.
A successful upload message will appear, with no errors.
If there are errors, there will be a corresponding error message for each PID.
Common Errors:
- A PID in the file does not correspond to a student in the class.
- A grade saved in the file is not valid for a particular student for the class.
Note: Even with errors, all entries where there is a valid PID and a valid grade will be saved.
Important: Only the students with errors will have a blank roster grade when the upload process is complete. Please go to Step 6 for instructions on handling any errors.
-
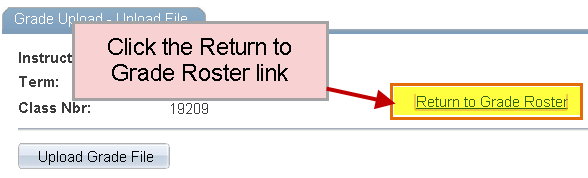
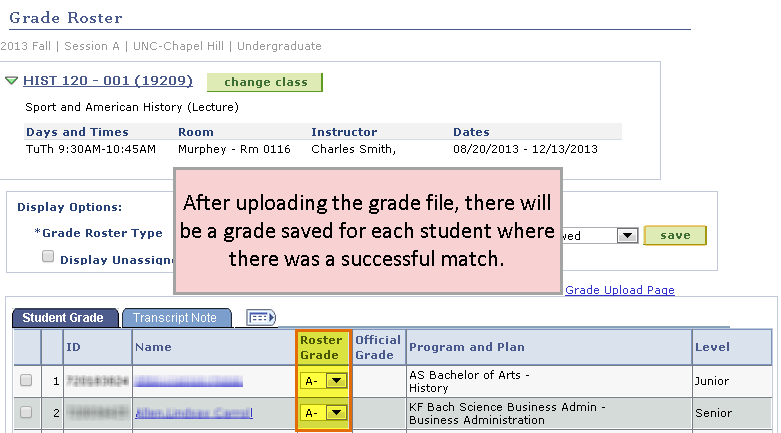
Click the Return to Grade Roster link once the upload process is complete.
-
After uploading the grade file, there will be a grade saved for each student where there was a successful match.
-
Review or change any grade on the grade roster
If there were errors in the file upload process and a grade could not be saved by the process for any student(s), there will be a blank in the Roster Grade column. To correct these errors select the appropriate grade from the Roster Grade column’s drop down menu.
Note: The upload process can be repeated. If this is done, every subsequent grade in the repeated upload process will replace an existing grade on the grade roster.
-
Set the Approval Status to Approved or Ready for Review, depending on the instructors’ access
-
Click the Save Button
Once the grade roster has been set to Approve, it will be submitted to the next scheduled Grade Post process. The student’s grade will be posted and become official grades. The Grade Post process is run by the Office of the University Registrar.